Plugins
What are plugins?
Plugins are an essential part of producing music in a DAW. They are additional software tools that integrate with digital audio workstations (DAWs) to expand their capabilities. They can mimic instruments, effects, and other audio processing tools, allowing you to create, modify, and enhance your music production with a wide range of sounds and effects.
I will walk you through the process of downloading and installing the plugins into REAPER. We will only do a few together, but as you progress I recommend exploring the vast world of plugins. Some are free and some are paid. I recommend starting with free plugins and upgrade to paid ones as you see fit. In general, paid plugins make it easier to do certain things that you could still accomplish with free plugins are more time. That being said, there are some paid plugins that you can’t really mimic with free ones.

Our Plugins
1. Vital – synth
2. ValhallaSupermassive – reverb
3. Frontier D16 – compressor
4. TDR Nova – EQ
5. Spitfire Labs – virtual instruments
6. Mike Zara Samples (not a plugin)
You are welcome to download more plugins and play with them as we progress throughout the course. However, I will only be demonstrating with the above plugins along with the built in tools in REAPER.
We will need to create a folder called Samples. The location for this folder is up to you, but this folder can become very large, so put it on a drive where you have lots of room. Many people use an external drive or secondary drive in their computer. You can put it on your main drive if you prefer.
Let us go through the plugins one by one until we get them each downloaded and installed. As you go through the installations, you will get several options. When it comes to the installation paths (where it asks you to install the plugins) leave them as default.
The other option you will get is which plugin formats to install. There are many different formats including: VST, VST2, VST3, AU, AAX, CLAP, etc.
Which formats should I install?
Select these formats for each of the following plugins.
If you are on Windows:
- We want to install only the VST3 version of the plugins. If it asks you for 32 or 64 bit, select only the 64 bit VST3 version.
If you are on Mac:
- We want to install both the VST3 and AU versions of the plugins. If no AU version exists, select just the VST3.
Vital
First thing you have to do is create an account. You have to do this before you can download it. Once you login to your account you will come to this page.
Select your operating system to download it.
Once downloaded, run the installer. Remember to install to the default locations and install just the VST3 (Windows) or VST3 and AU (Mac).


ValhallaSupermassive
https://valhalladsp.com/demos-downloads/
When you go to the link, scroll to the bottom or until you see Valhalla Supermassive. Select Mac or Windows.
Once downloaded, run the installer. Remember to install to the default locations and install just the VST3 (Windows) or VST3 and AU (Mac).
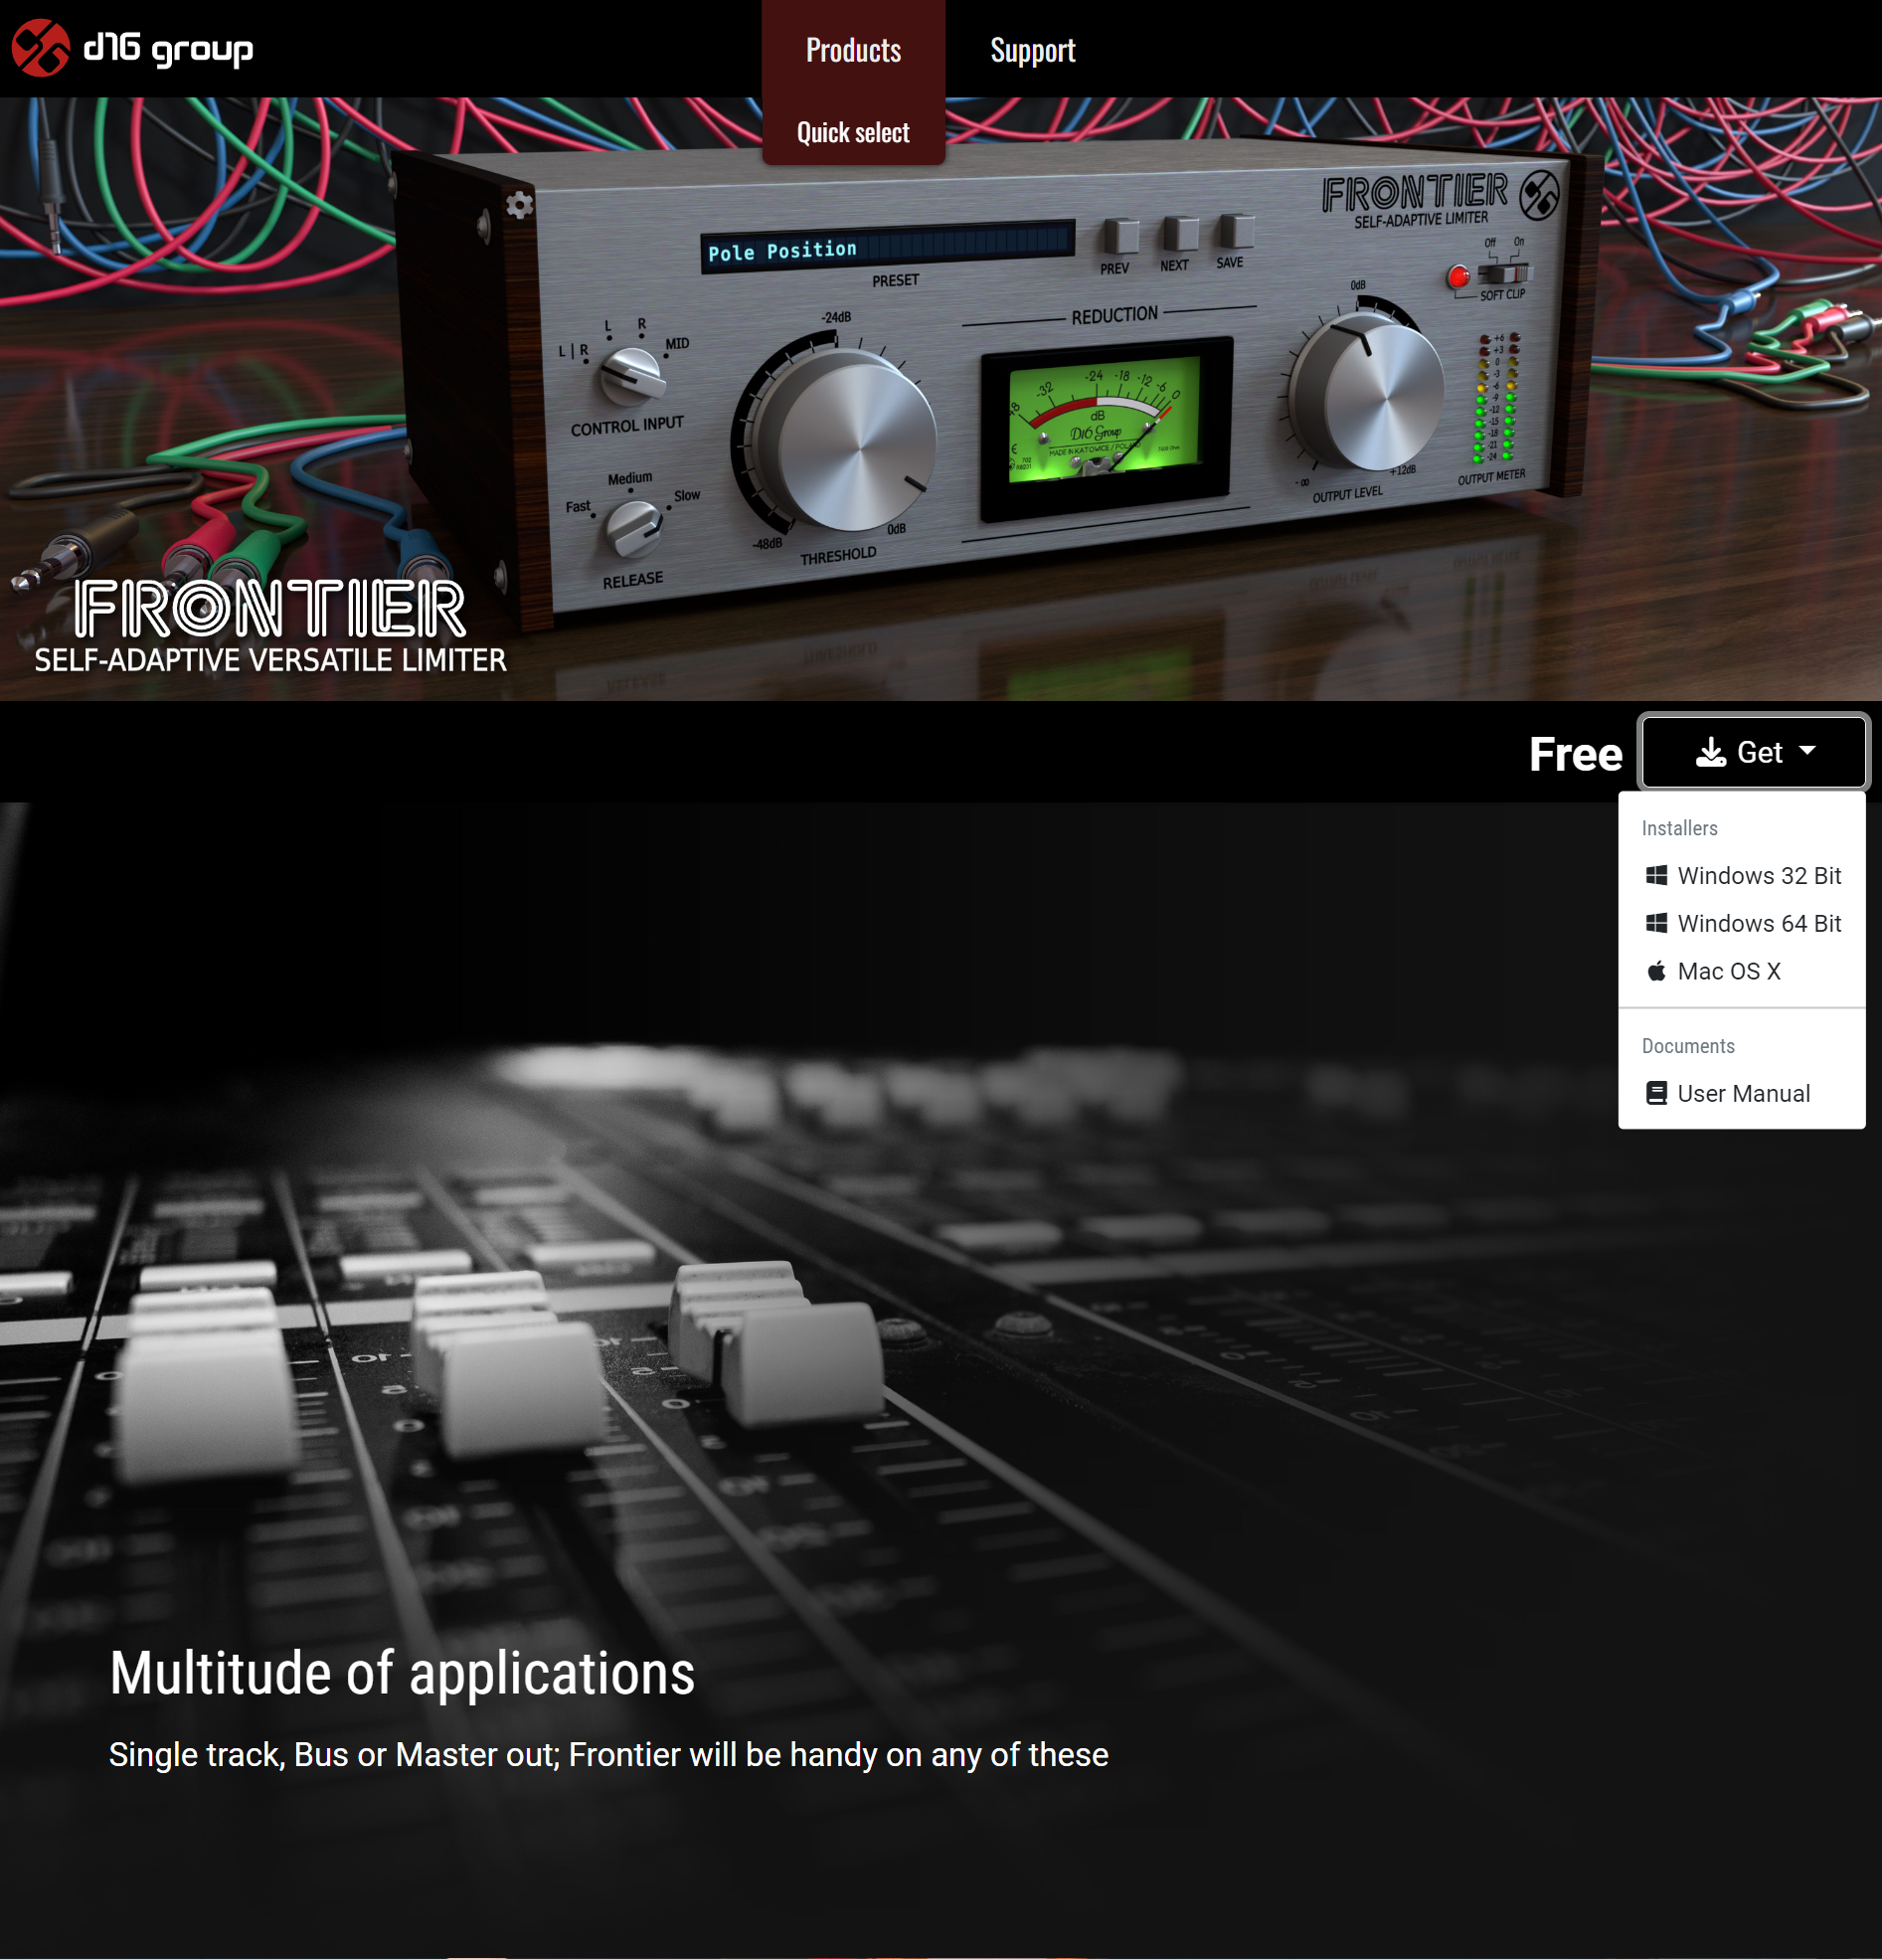
Frontier D16
From the home page you will see the Free and Get dropdown menu on the right side. Select your operating system to download. If you’re on Windows you will want the 64 Bit version.
Once downloaded, open the installer. This one looks a little different, so we will walk through it together.

You will come to this screen.
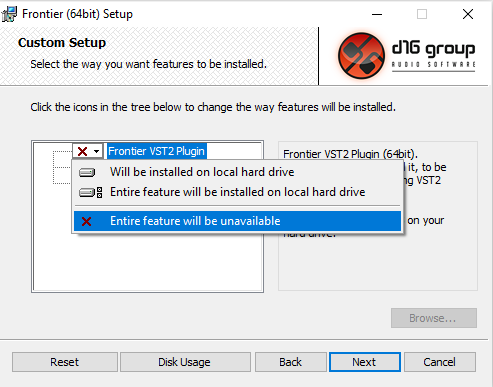
Next to the VST2 and the AAX format you want to click on the dropdown arrow and click on the X that says “Entire feature will be unavailable”

It should look like this before you click Next. Finish installing.

TDR Nova EQ
https://www.tokyodawn.net/tdr-nova/
On the right side of the screen, select your operating system. For Windows select the Windows installer.
It will ask you to select which formats you want to install, select the 64-bit VST3 Plugin (.vst3), and deselect the rest.
Once downloaded, run the installer. Remember to install to the default locations and install just the VST3 (Windows) or VST3 and AU (Mac).
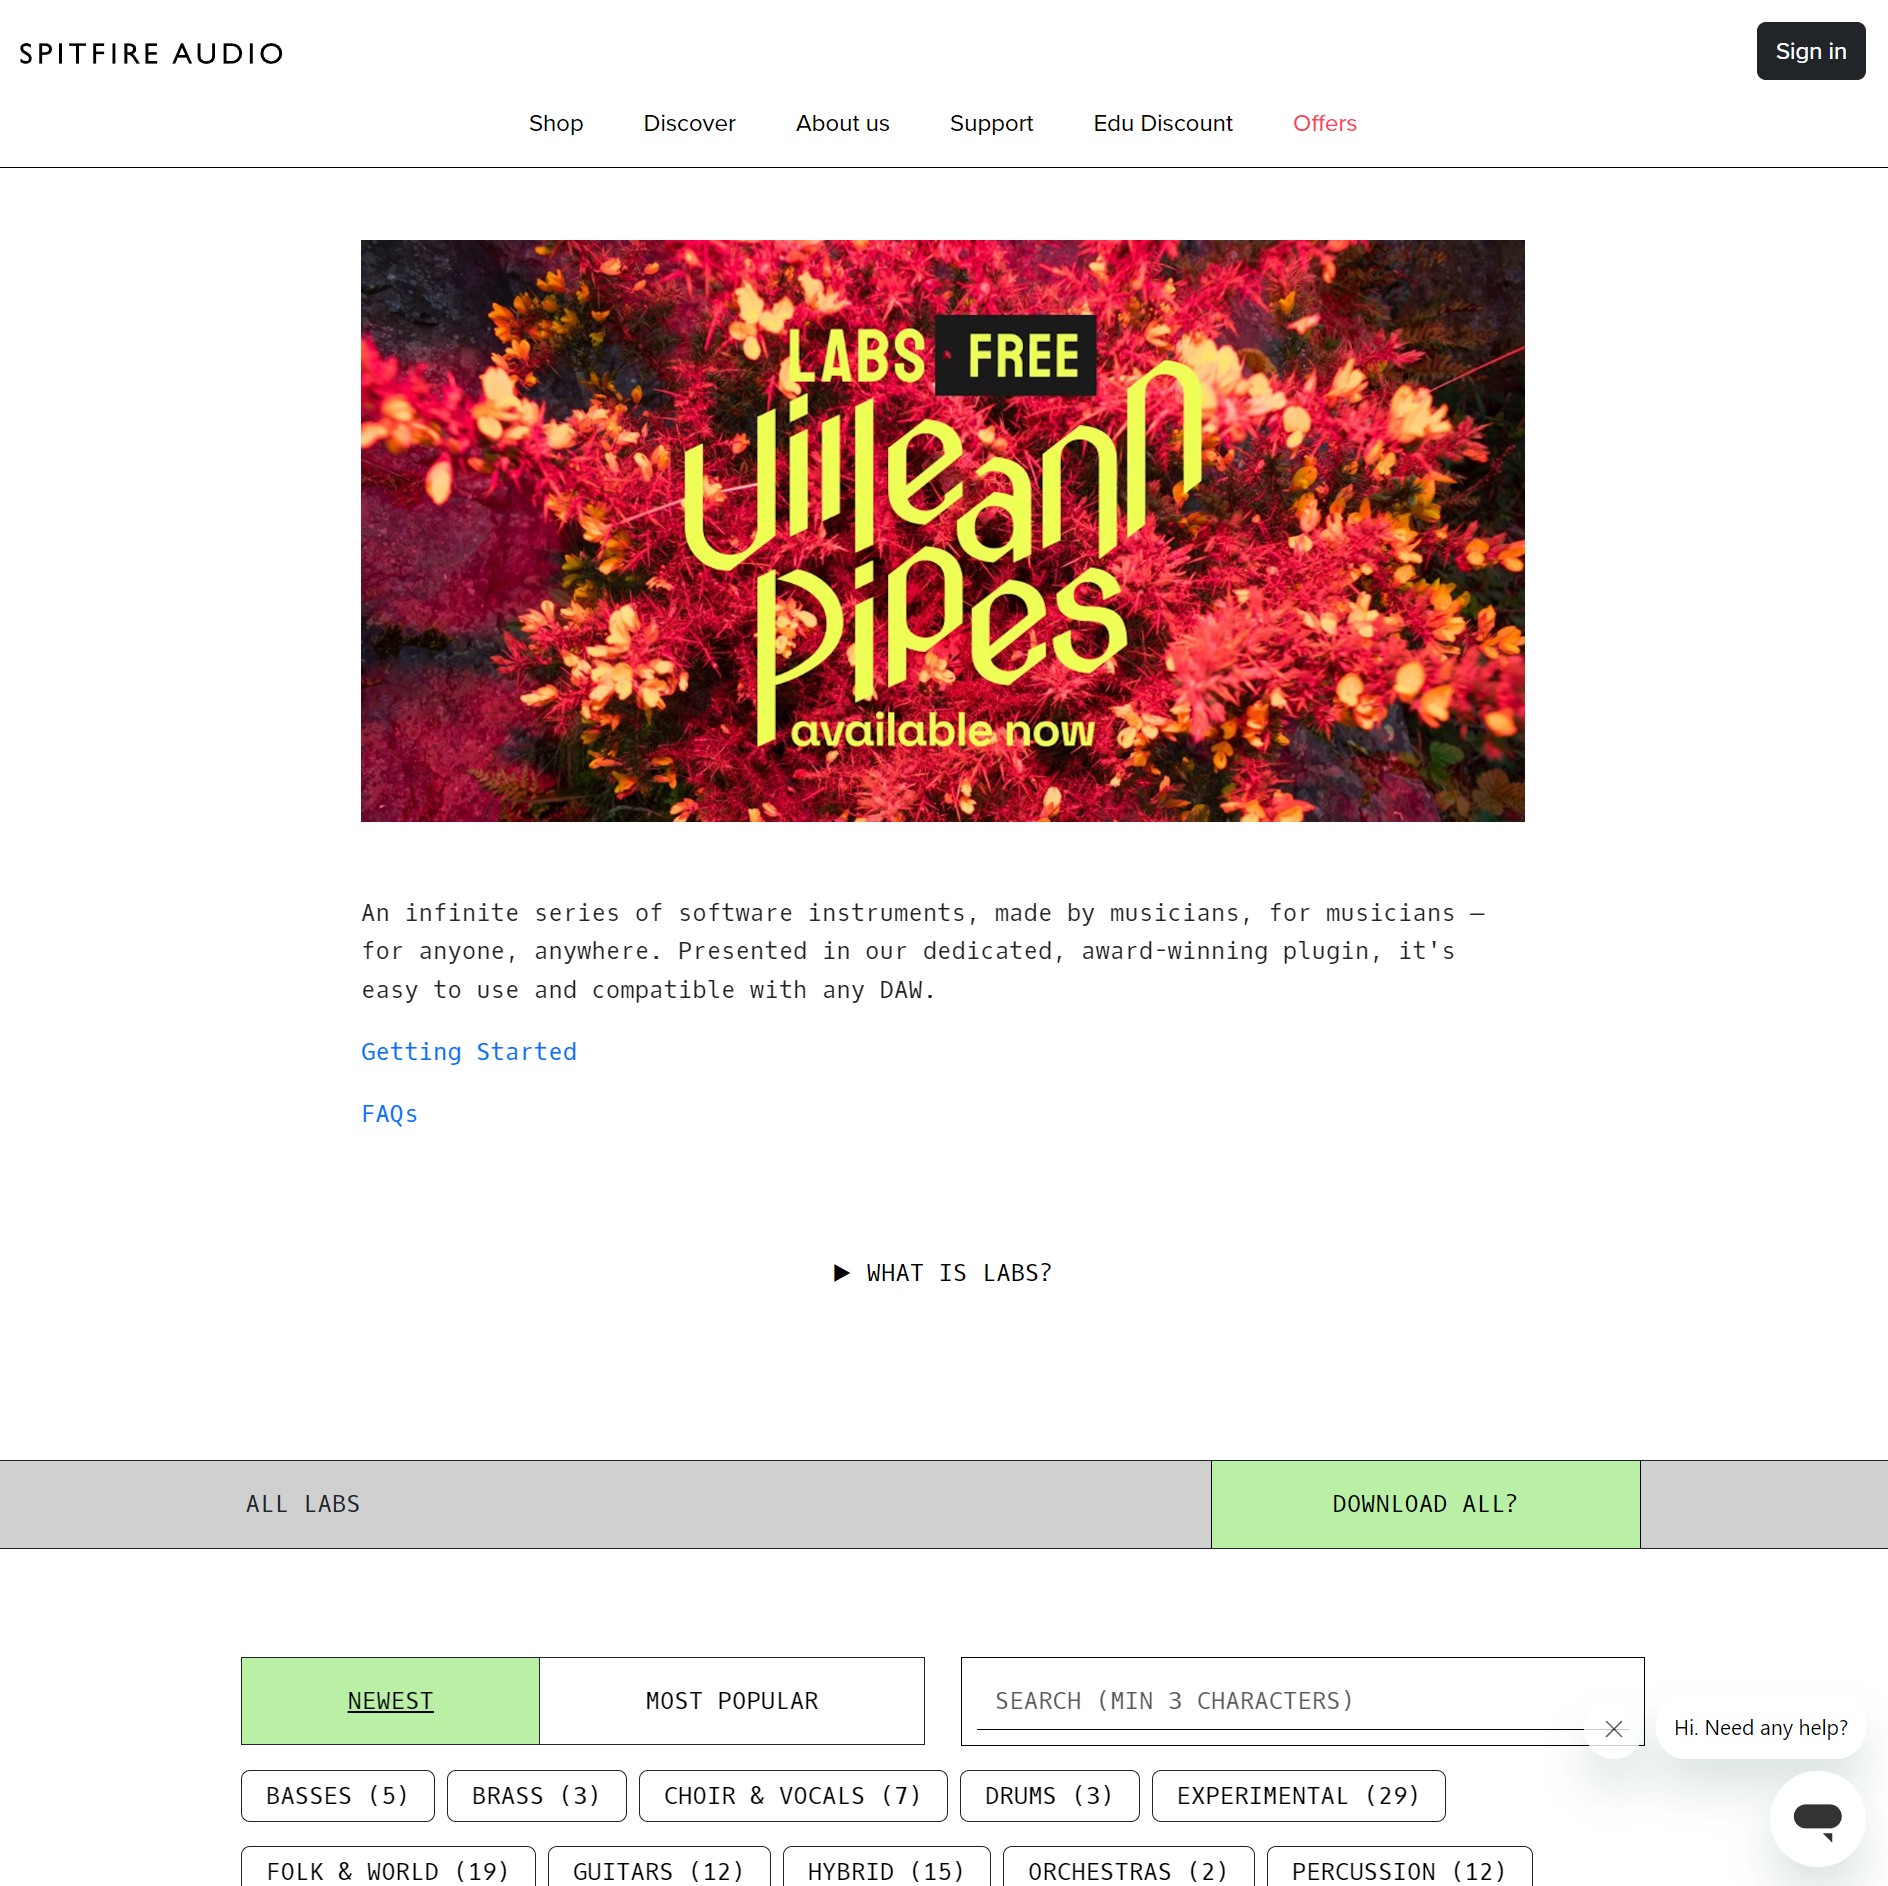
Spitfire LABS
https://labs.spitfireaudio.com/
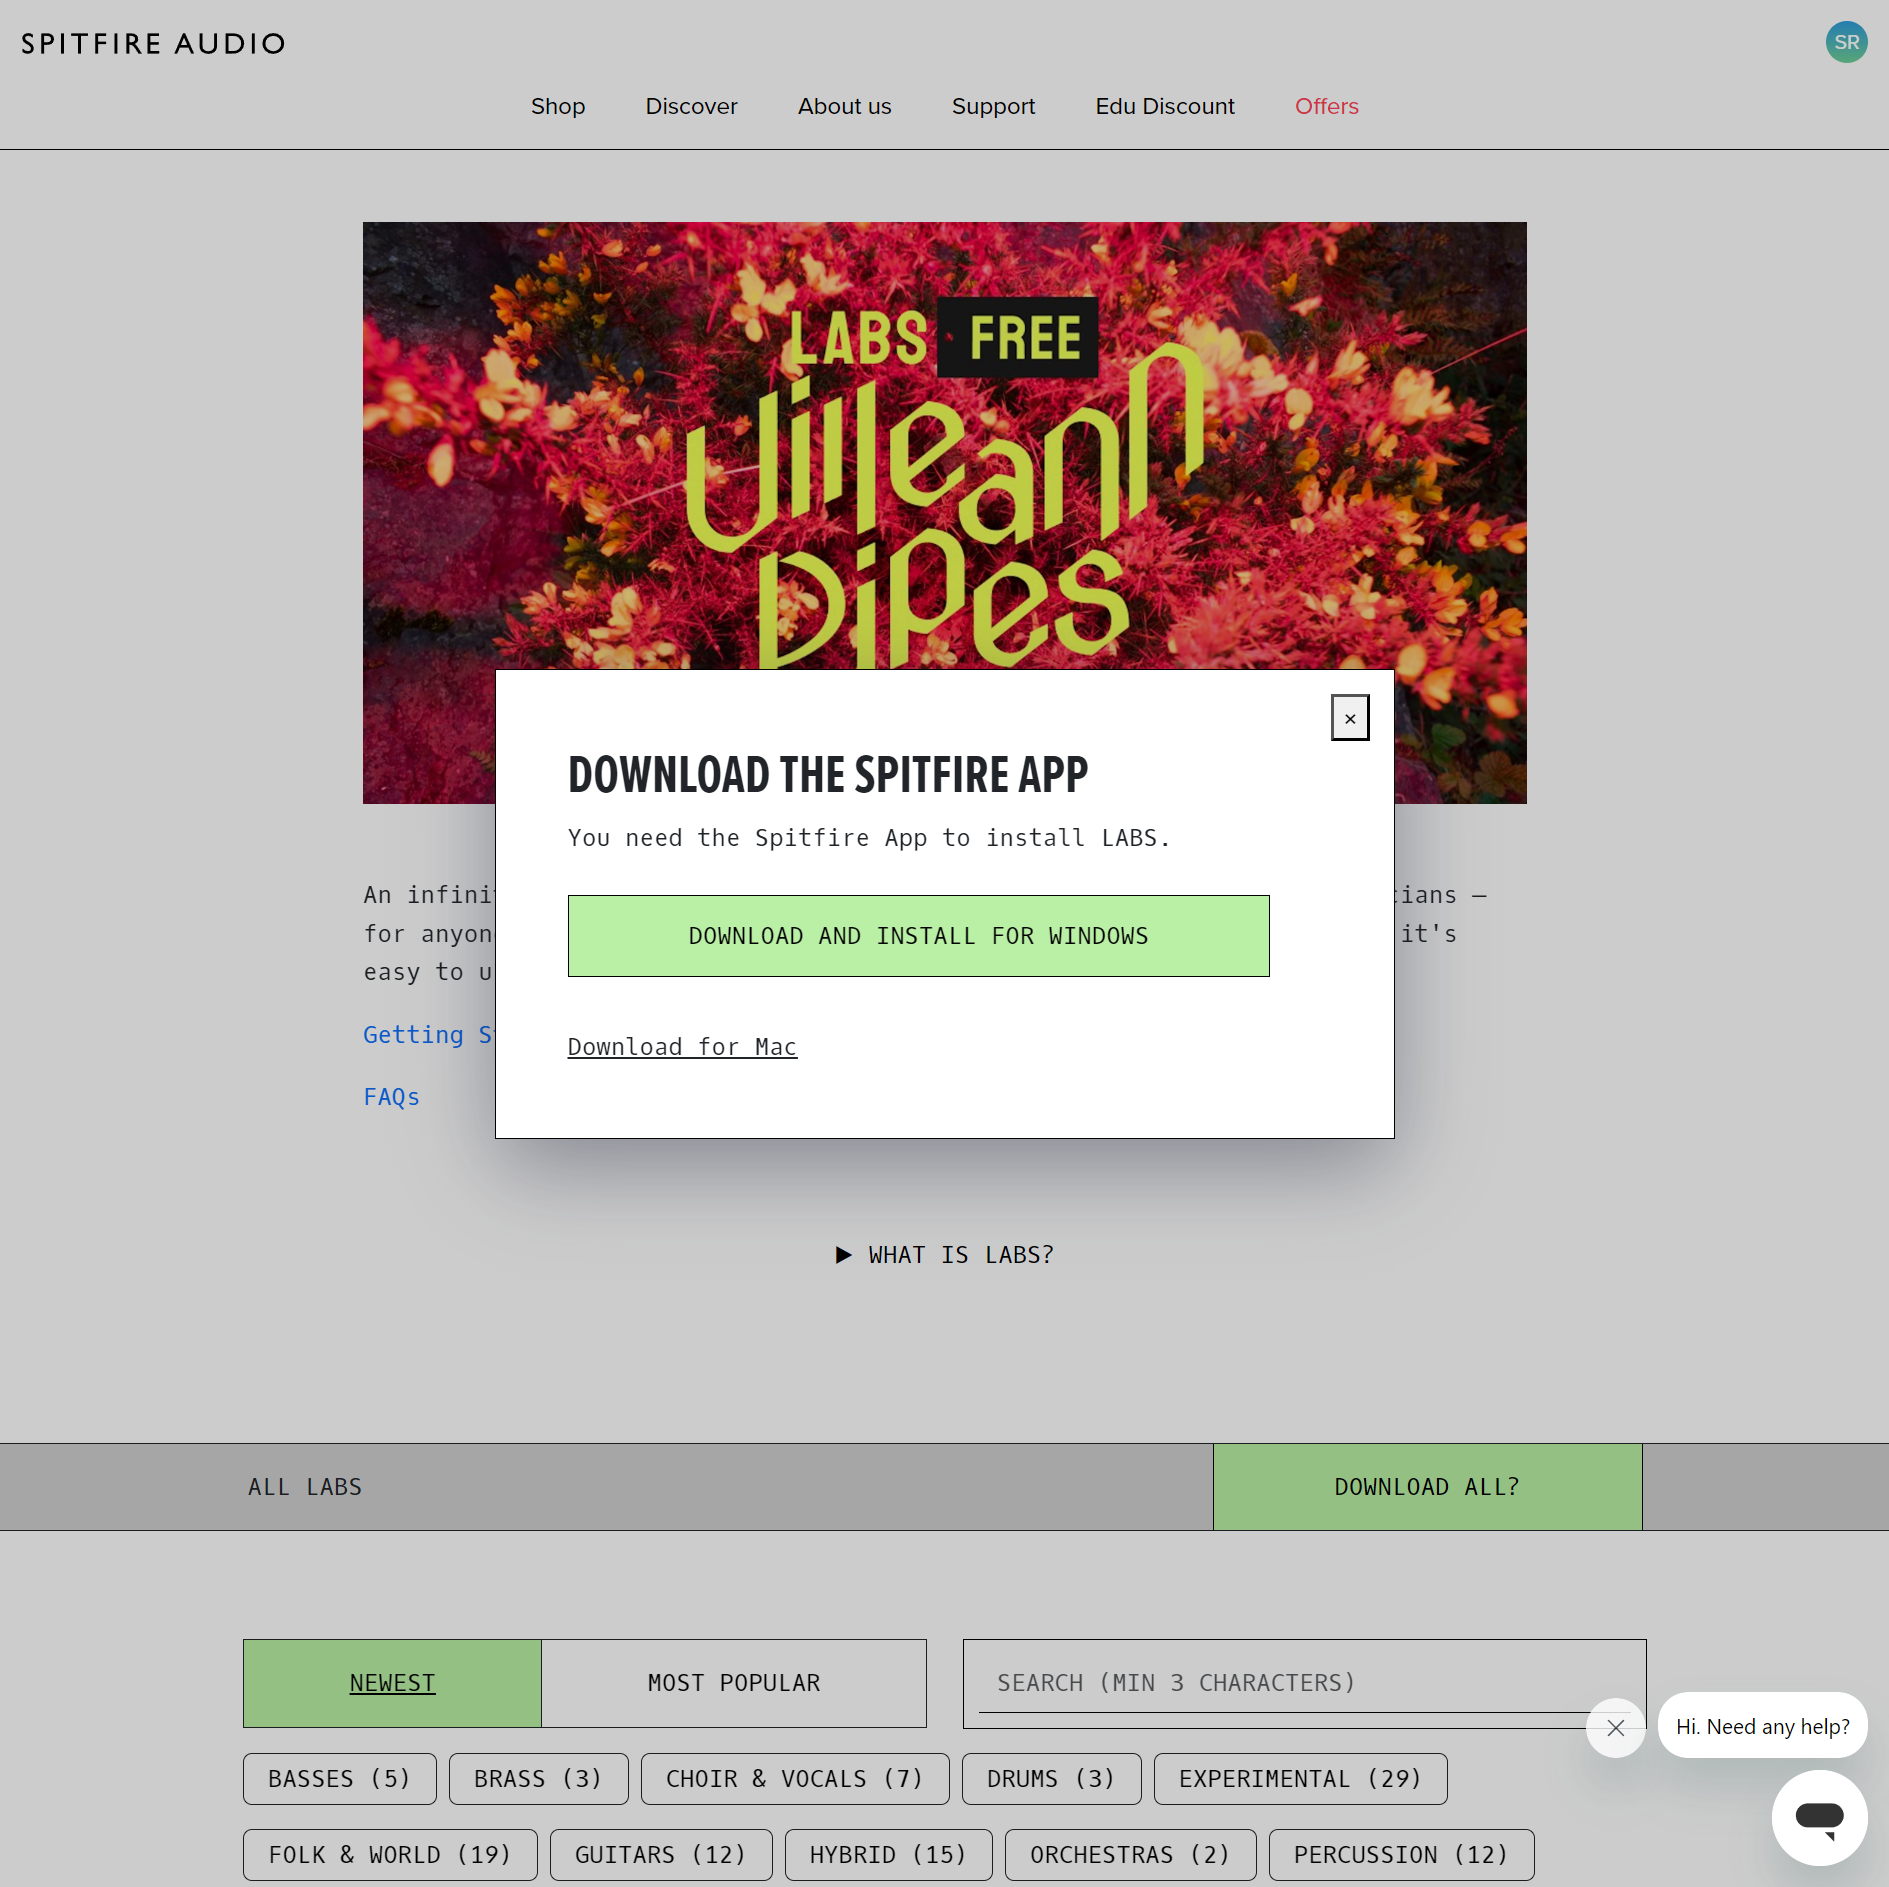
Similar to Vital, for Spitfire LABS we will have to make an account first. Once you make your account, go back to the home page and click the green Download All? button.
Leave everything to its default location.
Click Finish and the app should launch. You can close it for now. We will have a whole lesson later on using LABS, as it can seem a little complicated at first.

Mike Zara's Stash
https://www.mediafire.com/file/mblc53i9qa9him3/%2521Mike_Zara%2527s_Stash.zip/file
This one is just a folder you need to unzip. Be sure you unzip it to your Samples folder (that you created on a drive with lots of room), as this will be a fairly large sample base.
Be sure you select your operating system, then click the blue “Download” button.
Unzip (save the contents of) the folder to your Samples folder.
Plug-in paths
Next we need to tell REAPER where the new plugins are.
If you are on Windows:
– Option 1 (recommended): Control + P
– Option 2: In the menu bar at the top select Preferences > Plugins > VST
If you are on Mac:
– Option 1 (recommended): Command + ,
– Option 2: In the menu bar at the top select Options > Settings> Plugins > VST
You will come to the following screen. It is the same on Mac and Windows. Here I will demonstrate on Windows.
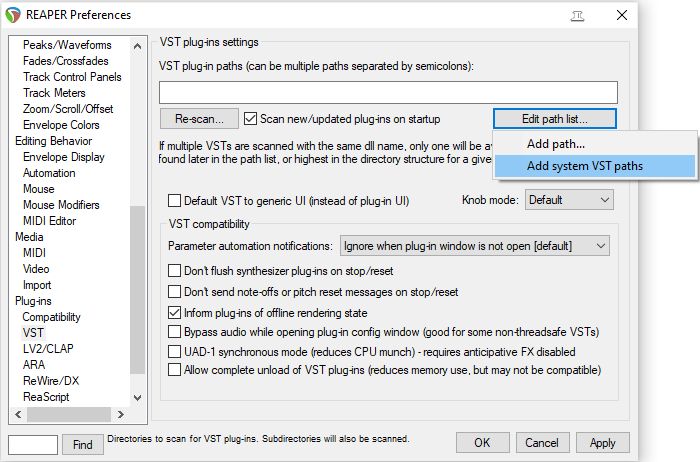
Click on Edit path list… and then select Add system VST paths.

Then you want to click on Re-scan…

You want to choose the Re-scan VST paths for new/modified plug-ins. When I add a new plugin this is also the option I select. You will mostly use this option unless you run into a problem with a plugin (and usually even then I would just redownload and install that plugin).
Click Apply and OK.
Congratulations! Your plugins are installed! I will show you how to find and use your new plugins in another lesson.